Tuesday, May 19, 2015

How to increase vmalloc size [vmalloc: allocation failure]

Hello,

So this is what happened, I was working on the graphics driver and testing some GLBenchmark applications to see if everything is smooth and healthy. But one of the test was always failing for unknown reason (at that time). I have put more than couple of hours to debug that. I was ignoring some errors in dmesg (kernel log) that I was getting,

May 18 14:53:38 pc-vbox kernel: [412318.373157] vmap allocation for size 37752832 failed: use vmalloc=<size> to increase size.
May 18 14:53:38 pc-vbox kernel: [412318.373161] vmalloc: allocation failure: 37748736 bytes
May 18 14:53:38 pc-vbox kernel: [412318.373163] GLBenchmark27_X: page allocation failure: order:0, mode:0xd2


Latter I found that application was quite a heavy and vmalloc is failing due to insufficient space. On x86_32 systems default vmalloc size is 128MB and can be override by vmalloc kernel boot option. vmalloc() allocates block of memory with continuous virtual addresses or pages  (no guarantee that pages are actually contiguous in physical RAM) . You can find current vmalloc size of your system as bellow,

$cat /proc/meminfo | grep -i vmalloc

VmallocTotal: 122880 kB
VmallocUsed: 28216 kB
VmallocChunk: 94156 kB


How to increase vmalloc space?
We have to modify the kernel boot options in grub in order to do that.
open /etc/default/grub and make following change,
This will increase total vmalloc space to 512MB, next you need to update the grub as follows,

$sudo update-grub

After this corresponding  change will be reflected in /boot/grub/grub.cfg file as bellow,


Then just reboot the system and that solved my problem. Its not the thumb rule to set vmalloc to 512M but just set to what solves your problem!

After reboot you can see vmalloc size increased,

$cat /proc/meminfo | grep -i vmalloc
VmallocTotal:     524288 kB
VmallocUsed:       64768 kB
VmallocChunk:     366544 kB


cheers


Wednesday, September 17, 2014

Capture and monitor dmesg continuously

Greetings folks!

If you are working on device drivers for Linux/Android we do rely on dmesg for almost all of the times. But you know the dmesg buffer is limited, its circular buffer. So what ever overflows the buffer is lost for good (?). We feel need to increase the buffer size but its not trivial task and also most of the times enough is just not enough!

Here are some simple scripts for Linux to log dmesg continuously and dump into file and at the same time you can monitor changes in dmesg!

Give exe permissions to script and run as bellow,
$sudo ./ldmesg.sh

Now, dmesg is getting continuously logged in dmesg.log file in current directory. Next script needs to be run in another terminal tab/window which will monitor changes in dmesg (actually dmesg.log).

Give exe permissions to script and run as bellow,
$./mdmesg.sh


Image bellow shows dmesg being monitored.

For Android developers, here is ldmesg modified to use it over adb,
 
-- Cheers!!

Monday, June 2, 2014

Linux Experience on Windows!

Yes, I love Linux and Windows too (yaah!..lets just say that!, as I use windows phone :)). Almost all engineers works most of the time on Linux and likes to fly VIM and similar editing tools. But sometimes sh*t happens and we forced to work on Windows and believe me it really feels like trapped in hell. Yes, I have been there, So here is your door to Heaven through the Hell!

Cygwin , Its your door way. It gives same experience as Linux shell. It includes most of the packages engineer/programmers need. Even you can ssh to remote Linux system using same command as in Linux shell, do you believe! and list goes long, Let curiosity be your guide!

Here are some basic instructions for setup...

1. Installation
 Download installer according to your system needs (32/64bit) and start installation.
 Just go through usual installation steps,


Next...Next...


Choose any site to download from...
Wait for a minute...


Now you need to search packages you need and mark them for installation. 
There long list but I'll install vim for reference.
Search for it...
 Mark VIM for installation and go next...


It will find package dependencies and start downloading it, give it a time...

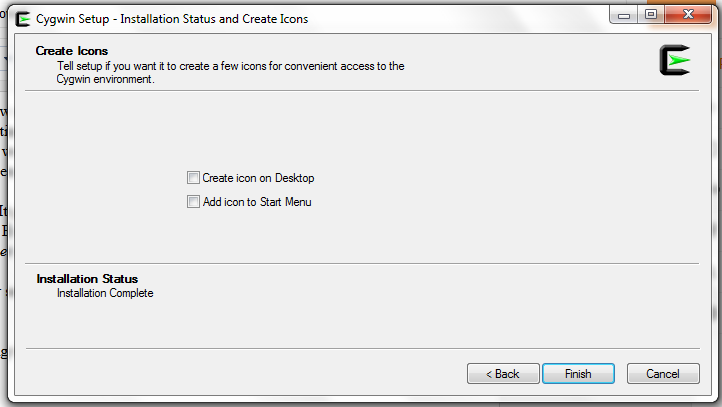
Click 'Finish' and installation is done.

2. Running VIM in Cygwin:
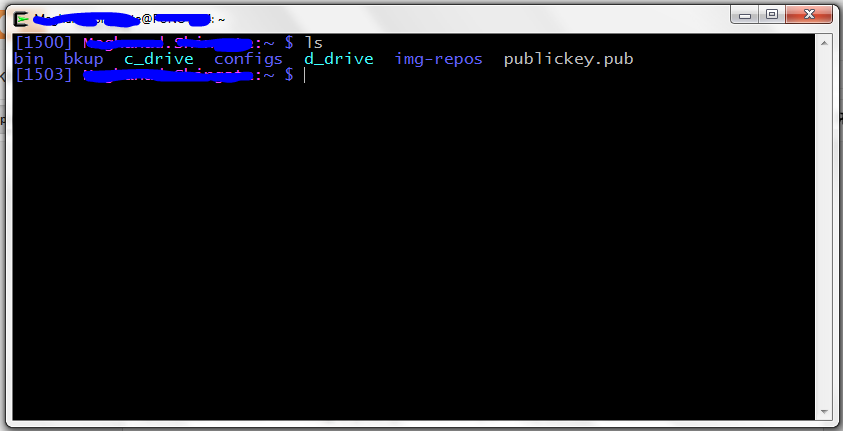
Now, go to start menu and start Cygwin. It will open shell similar to Linux shell. Your root directory will be installation directory (C:\cygwin64\)


Now, you can put your vimrc in your $HOME directory (i.e. C:\cygwin64\home\user.name\.vimrc) and it works just perfectly.

Here is bashrc file in vim ($vim .bashrc)

Cheers!

Saturday, June 15, 2013

VPN Client for Linux Systems: Alternative for Cisco AnyConnect VPN Client

Hi,

Here is how you can connect to your VPN server without Cisco AnyConnect VPN client.


1. First install network-manager plug-in for VPN

 $ sudo apt-get install network-manager-openconnect  

2. Click on your network manager applet you will see  "VPN Connections" option, roll mouse over it, some options will pop-up, then click on "Configure VPN..."


3. Then click on "Add" to add new VPN connection, select VPN connection type "Cisco AnyConnect Compatible VPN (openconnect)" and click on "create". Window to configure new VPN connection will pop-up.


4. Then enter your VPN gateway and click save.


5. To Connect to VPN, go to network manager applet again, then "VPN Connections", it will pop-up VPN connection you just created, click on it.  Then VPN connection window will be up, just click on connect icon to establish VPN connection.


Done!
cheers!!

Thursday, June 13, 2013

Life of C : Part 1 - Compilation

Hi Guys,

From so long I was thinking of putting some stuff together regarding all basic things about C that gives better understanding not only about C but also some about OS perspective. So Here is the start, (oh please... "Hello World!" again)


0. Prerequisites 
Through out the post I am assuming that reader has some knowledge of C. All explanations/examples  bellow are tested/explained on Linux system. To prepare system install following packages,

1. Compilation
Bear with the stupid example :)
This is basic C program, almost all programmers have written this program at least one in life.

Ok, so this is the C syntax to say computer to write/ display "Hello Guys!". What happens next?
Program to become executable it needs to go through certain steps,

1. Pre-processing
2. Compilation
3. Assembly
4. Linking


To see all intermediate file in process of compilation compile above program as follows,

This will save all intermediate files in current directory.
 1. Pre-processing
This is very first step in process of compilation of the C program. It mainly does following tasks,

1. Macro substitution
2. Comments stripping
3. Expansion of included files


Output of pre-processor for above program is as shown bellow,

file explanation:
1. first observation is at end of the file you can see argument in printf() is replaced by string "Hello Guys!" instead of macro.
2. second is it does not have any comments we added, they have been stripped out.
3. Third observation in "#include<stdio.h>" is replaced by lots of other stuff. It has been expanded and added in the source file so that compiler can clearly see "printf()" function.

It says printf() is defined somewhere externally.


2. Compilation
Next, compiler takes helloguys.i as input and converts it into compiler intermediate output file. This is assembly code. You can see "helloguys.s" file bellow. its consists of assembly instructions of your processor. Next assembler takes this instructions and converts them into machine code.

3. Assembly
In this stage "helloguys.s" file is taken as input and intermediate file "helloguys.o" is generated. This is object file.

This file contains machine level instructions. But function calls to external functions are not resolved yet. Since this is machine code it's not readable. But still see, it will look as bellow,

ELF string in file tells that this is Executable and Linkable Format.

4. Linking
So, this is the final stage of compilation process. It does linking of function calls and their definitions. Like printf() function. Until now this code doesn't know anything about printf(). It only puts place holder at the place of function call. At his stage actual function call printf() gets resolved and function address gets plugged-in.

function of linker:
1. Plug-ins actual function address
2. It also adds some extra code/info in your file. To run our code we need to submit it to system, so this stage adds some extra code to your code like, at start of code OS needs to set some environment variables, command line arguments plus some OS specific code so that OS can signal your application. Also to while exiting, code needs to return some variables to OS which will help to maintain the status of code and its environment. This all extra things will be added by linker.

To verify it, do following,


At least you can see that size of executable is lager than object file.

So, now you know Life of C, the stages that your code needs to go through before becoming executable.  This is just a tip of an ice-burg, there is lot more if you want to go into details.

Next part of the Life of C, will contain the life of your executable, what all happens when you submit it to OS to run.


Cheers!!!  

Wednesday, June 5, 2013

How to fix "VPN client driver encountered an error" on Windows 7/8 : Cisco AnyConnect VPN Client

This is most common problem with the windows 7/8.
While connecting to the corporate (or personal) network using Cisco AnyConnect VPN Client it gives error massage as bellow,
" The VPN client driver has encountered an error"

Solution is very simple, its just error in driver name in windows registry for VPN client driver.

  • Solution: (Windows 8)
1. Press Windows key to go to start menu
2. type "regedit" and hit enter, you will enter into Registry Editor window
3. Go to registry key "DisplayName" for vpn client driver as follows:

HKEY_LOCAL_MACHINE\SYSTEM\CurrentControlSet\Services\vpnva\DisplayName

4. Double click on "DisplayName" and remove everything before "Cisco AnyConnect VPN Virtual Miniport Adapter for Windows"

For Example:
replace: "@oem8.inf,%vpnva_Desc%;Cisco AnyConnect VPN Virtual Miniport Adapter for Windows"
with: "Cisco AnyConnect VPN Virtual Miniport Adapter for Windows"

5. Click on "OK" and (re)start Cisco AnyConnect VPN Client
6. Enter your vpn server (e.g. myvpn.company.com), and enter your credentials as requested.
7. Click on Connect, DONE.

(Similar changes apply to Windows 7)
Cheers!!! 

Friday, May 24, 2013

Free Source Code Hosting for Personal/Business Use

Even as student or  in life time of Engineer we do many things, many great things (hehe), tonnes of projects, seminars etc. and we never know when we might need to re-touch or re-collect the project codes, presentations, latex reports, documents and so and so ... yes storing them on the optical disk or in some back-up drive is good idea but not the great one... we never know when this stuff stop working, after all we built it... isn't it? So you need to put them in place where they never get lost....on SOURCE CODE HOSTING SITES.

So there are many free source code hosting sites out there. Some of them can be used for small businesses for sharing and development, most of them comes with version control tools like mercurial (on of the best and easy). Here I am going to introduce you to some of them.


  1. Bitbucket:
    This is the one of the best source code hosting site suited for small business and of course for personal use too, its closed source site, no one can peek into your repository. For business purpose you can share any repository between FIVE users for free. You need to pay for more than five users. It comes with mercurial and git version control tools. Only disadvantage is that, if you are going to develop some open source tool/project you cant put good wiki pages related to your project.


    Advantage: Closed source code, no one can peek into your code, professional tool
    Disadvantage: No good wiki support
    Version Control: Mercurial, Git
  2. CodePlex:
    This is Microsoft's code hosting site. This is having most elegant interface and awesome wiki support. It also has best code sharing, discussion forum support. It has all facilities that person/group need for open source project development.
     

    AdvantageBest suited for open source projects. It has wiki, forum, sharing support, elegant design.
    DisadvantageYour code might not be closed.
    Version Control: Mercurial, Git
  3. Google Code:
    As can be seen from name itself, its service provided by Google. It also has good facilities, but interfaces are not that good. CodePlex is better than this, which provides same (more) services in elegant way. But one advantage is that, its linked to your Google mail account.


    AdvantageGives all basic tools with simple interface. Linked to your Google account, wiki support.
    Disadvantage: Interface is simple, your code might not be closed.
    Version Control: Mercurial, Git


So, in short if you are looking for personal, closed source backup tool or small business source sharing tool BitBucket it best suited for you. If you are open source enthusiast CodePlex is best suited. Google Code is just an alternative if you are looking for...

Cheers !!!